森綠的兩個兒子都很喜歡吃披薩,但家中並沒有焗爐,剛巧在超市看到了TORTILLA (墨西哥薄餅·玉米餅)的皮便靈機一觸,想到用TORTILLA的皮作披薩的底餅。
這也是一個很好的親子活動,小孩可以幫忙切食材和可以自己裝飾自己的薄餅,森綠兩個兒子都很喜歡以食材設計自己的披薩。做法很簡單易做,也很美味,希望你們喜歡。
請按這連結看森綠所做的影片https://youtu.be/9UmClXHY3oQ
在超市買的TORTILLA (墨西哥薄餅)皮一包內多有8塊。在我家,大人和小孩每人可以吃2個披薩,所以一包TORTILLA 可製作出約4人份量。關於放在披薩上的配料,可以放自己喜歡的食材,森綠的兒子最愛是夏威夷披薩,所以以下寫的是夏威夷披薩的配料。
夏威夷披薩材料:
1. TORTILLA (墨西哥薄餅)皮(1包)
2. 罐頭菠蘿·鳳梨(1小罐,隨自己喜歡)
3. 火腿 (8 片)
4. 洋蔥(1 小個)
5. 燈籠椒(1 個)
6. 粟米(1 條)
7. 用來煮意大利麵的蕃茄醬汁(半樽)
8. 帕瑪森芝士(隨自己喜歡)
做法:
1. 把放在披薩上的食材切好。因為烤披薩的時間不長,所以需要先把披薩上的配料煮熟。因為有小孩,森綠把火腿和燈籠椒略焯,把粟米先蒸熟而洋蔥則略炒。
2. TORTILLA 上先塗一層蕃茄醬汁,然後放上已處理好的配料,最後洒上帕瑪森芝士
3. 把煎鍋蓋上蓋子,以中小火加熱約2分鐘
4. 然後放上已裝飾好的披薩,蓋上蓋子,以中小火加熱至芝士蓉化,約2-3分鐘
個人心得:
1. 因為加熱披薩時間只有2-3分鐘,放在披薩上的配料最好是可以生吃或已煮熟
2. 注意火的大小和烤的時間,火太大或烤太久會令披薩的底部焦燶
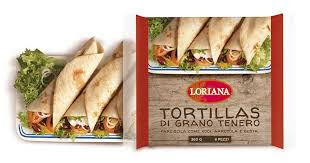
3. 大多的TORTILLA在烤後都變脆,很可口,但有些牌子的TORTILLA 會較耐嚼,口感不太好,森綠一家有一次嚼至嘴巴也有些累。以下是在視頻中用的TORTILLA,但很多牌子也是蠻好的,估計森綠試過5隻牌子,只有一個是十分耐嚼的,有機會會上載圖片

我也有寫Blog介紹旅遊,有興趣可到這網址: http://travel.sumlook.com
~.~.~.~Recipe of DIY Pizza with an oven in English~.~.~
Both my sons love Hawaiian pizza. However, since we do not have an oven at home, I got an idea to use tortilla wrap as the pizza base to make our own pizza at home.
This can also be a great activity for kids. They can help to cut the ingredients and decorate their own pizzas. My sons love to decorate their own pizzas like making smile face.
For the toppings, you can choose any ingredients you like but since my sons love Hawaiian pizza, the recipe below is of Hawaiian pizza.
Here is our recipe. It is very easy and makes. Please click on this link to see my video: https://youtu.be/9UmClXHY3oQ
Each pack of Tortilla includes 8 pieces which can serve about 4 persons.
Ingredients for Hawaiian pizza:
1. TORTILLA wrap(1 pack)
2. Canned pineapple(1 can)
3. Ham (8 pieces)
4. Onion(1 small)
5. Bell Pepper(1)
6. Corn( 1 )
7. Tomato sauce for pasta(1/2 bottle)
8. Parmesan cheese(personal preference)
How to Cook:
1. Prepare the toppings by cutting and cooking. Since the "baking time" is not so long, it is better to have the toppings cooked or ready to eat. In my case, because of the kids, I have blanched the bell pepper and ham, steamed the corn and fried the onion before putting them on the pizza.
2. Spread the tomato sauce on a TORTILLA wrap, then put the toppings on, lastly sprinkle the Parmesan cheese.
3. Preheat the frying pan with the lid on, using medium low fire, for 2 minutes.
4. Transfer the pizza onto the preheated pan, put the lid on, heat it with medium low fire for 2-3 minutes or until the cheese is melted.
Thoughts and Tips:
1. Since the "baking time" is only 2-3 minutes, the toppings would need to be cooked or ready to eat.
2. Be careful with the cooking time and the fire. If the heat is too hight or cooking time is too long, the bottom of the pizza is easy to get burnt.
3. TORTILLA of most of the brands I tried will become cripsy and yummy after the baking. However, I have also tried a brand before which is quite chewy that our jaws were quite tired of the chewing and the texture was not so good. I have tried about 5 brands of Tortilla and only 1 of them is chewy so most of them are good to use. Belows are the tortilla and tomata sause I used in the video as a reference.
We also have a blog on travel, please visit at http://travel.sumlook.com
Happy cooking!
留言
發佈留言